Use the setup wizard
When you activate Milano for the first time, the setup wizard opens automatically. It walks you through every required step in order — enter your purchase code, install the child theme, install the required plugins, and import a demo — so you have a working store in about 30 minutes.
If you would rather set things up by hand, or you need to redo a single step, see Install Milano for the manual path.
What the wizard does
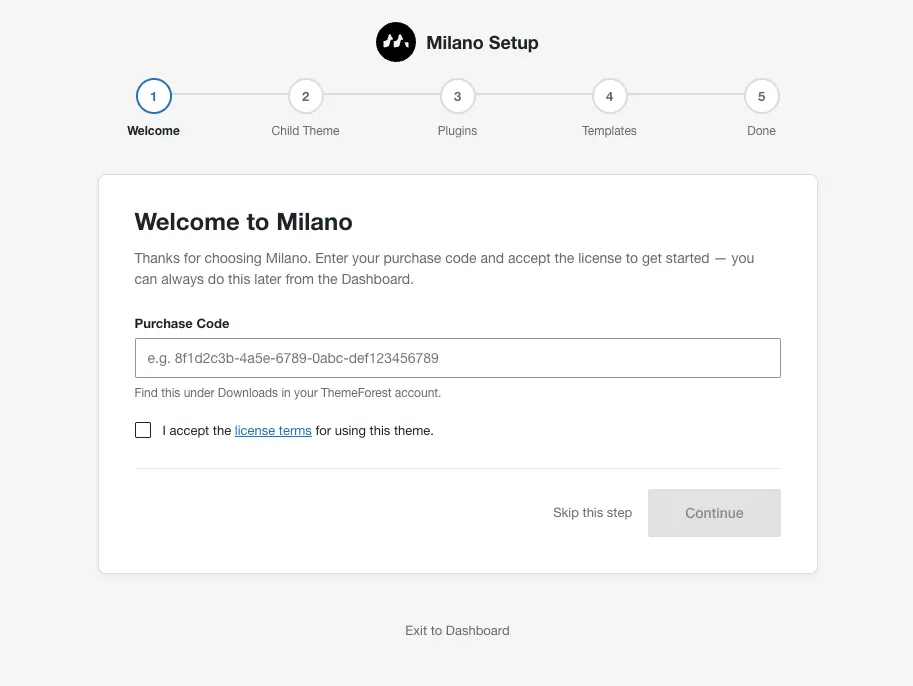
Section titled “What the wizard does”The wizard runs five steps in this order. Steps 1–4 are skippable; the final Done step is the confirmation screen.
| Step | What it does |
|---|---|
| 1 | Welcome — enter your purchase code and accept the ThemeForest license terms |
| 2 | Child Theme — install and activate the child theme |
| 3 | Plugins — install the required and recommended plugins in one batch |
| 4 | Prebuilt Templates — pick a demo and import it, or apply Elementor settings only |
| 5 | Done — confirmation screen with shortcuts to the dashboard, Customizer, and site |
What you’ll see
Section titled “What you’ll see”A stepper bar at the top shows all five steps and which one is active. The current step fills the main panel. You move between steps with Continue and Back buttons; most steps also have a Skip this step link.
Re-launch the wizard
Section titled “Re-launch the wizard”The wizard only opens automatically once — the first time you activate the theme. To run it again, open the License section of the Milano dashboard:
- Go to Milano → Dashboard in your WordPress admin.
- Click the License tab.
- Click Re-run the Setup Wizard at the bottom of the page.
The wizard opens on the Welcome step and runs through the flow again.
Skip the wizard
Section titled “Skip the wizard”The wizard is optional. Every step except the final Done screen has a Skip this step link that lets you complete it later from the WP admin. Use this if you want to:
- Register your purchase code with a different license.
- Install the child theme yourself.
- Choose your own plugins instead of the default set.
- Build a custom site without importing a demo.
If you skip the wizard entirely, the same four steps are still available as manual guides in the section below.
Manual equivalents
Section titled “Manual equivalents”The wizard’s steps are documented in detail on their own pages. If you skipped the wizard, or want to redo a step by hand, follow them in this order:
- Before you begin — confirm your hosting meets Milano’s requirements.
- Install Milano — upload and activate the theme. The wizard opens right after this step.
- Register your purchase code — license, updates, and support.
- Install the child theme — keep your customizations safe across updates.
- Install required plugins — WooCommerce and Elementor.
- Import a demo — start with a pre-built storefront.
Troubleshooting
Section titled “Troubleshooting”-
Problem: The wizard does not appear after activation.
Fix: Some hosts delay admin notices on a fresh install. Refresh the WordPress admin, then re-launch the wizard from Milano → Dashboard → License → Re-run the Setup Wizard. If the wizard is still missing, deactivate and reactivate the theme under Appearance → Themes.
-
Problem: I want to change a step I already completed.
Fix: Re-run the wizard. It starts from the Welcome step regardless of completion state, so you can redo any step.